DIY Coconut Butter + Lemon Coconut Truffle Fudge

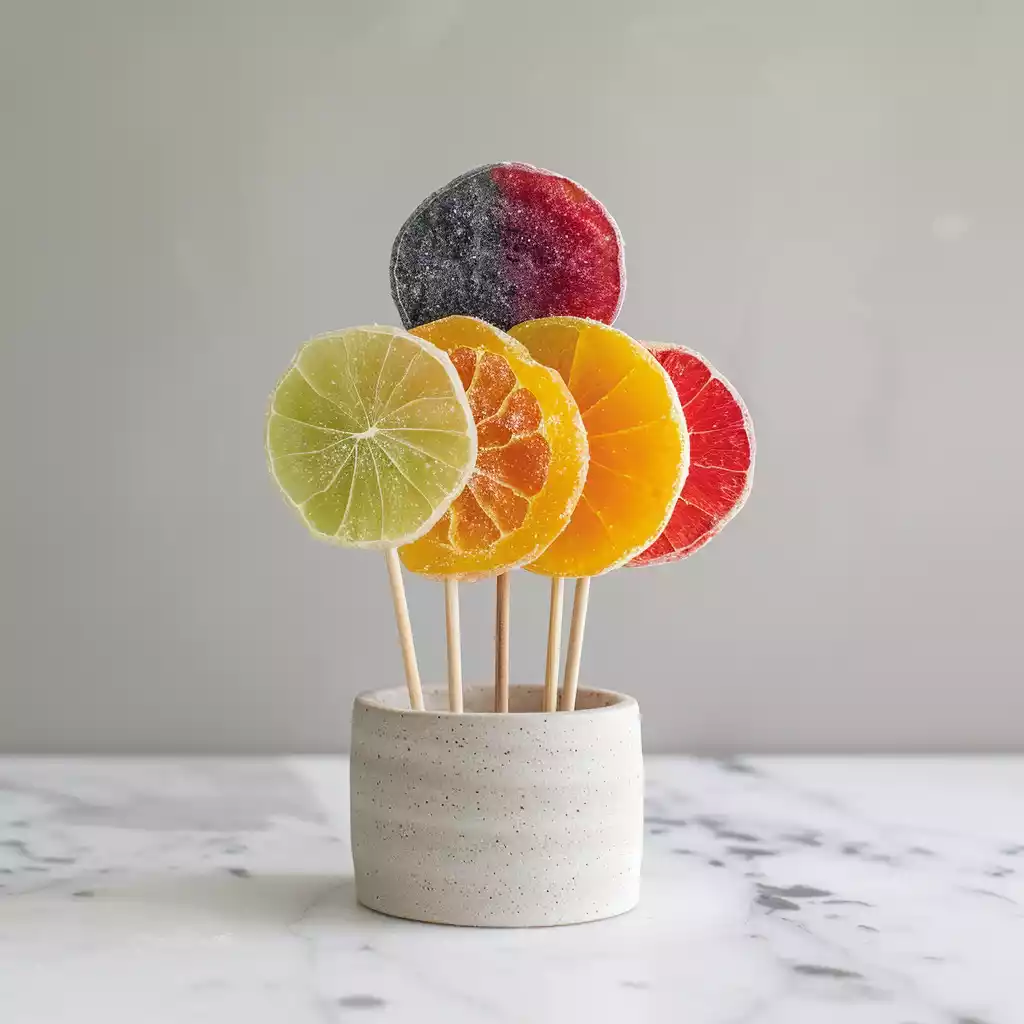
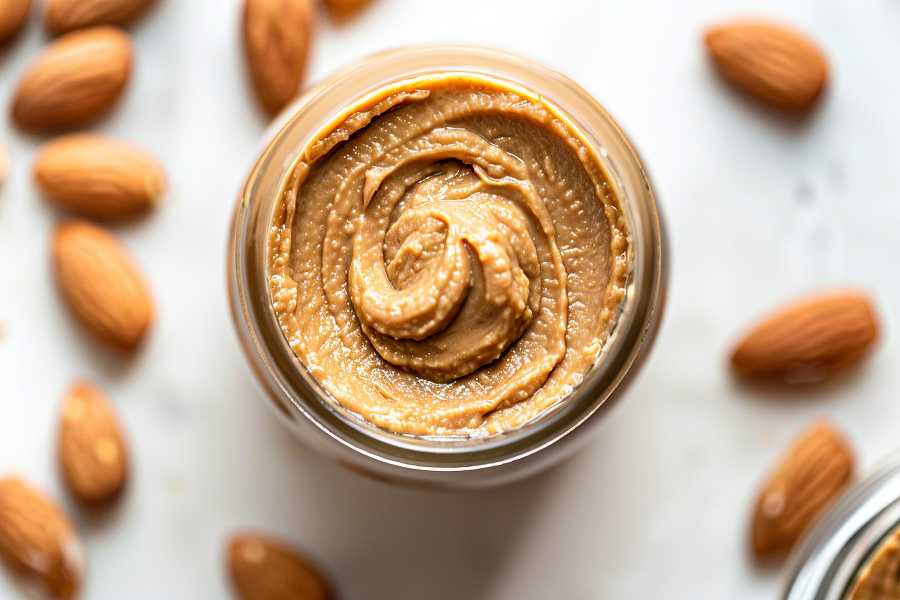
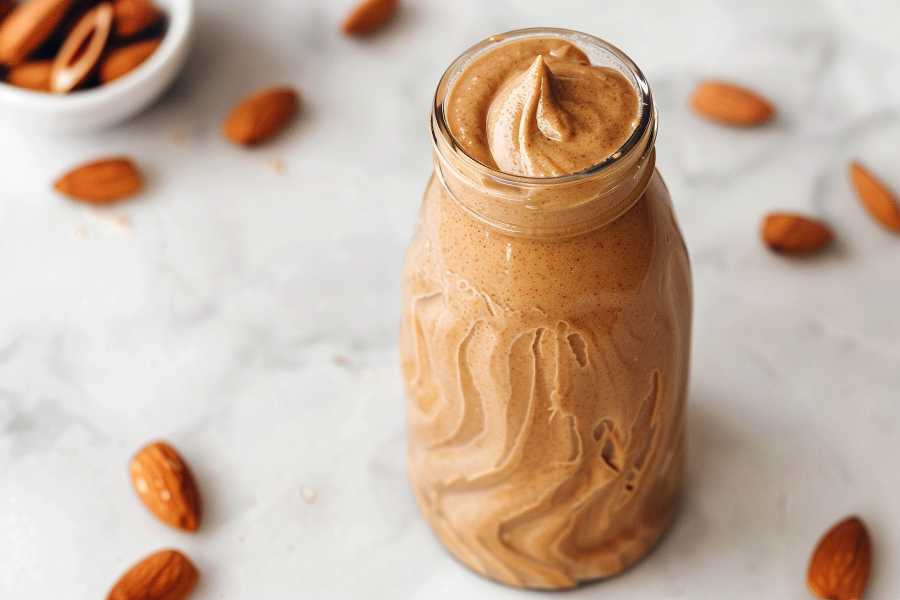
Coconut butter feels like one of those tiny luxuries we all deserve. It’s silky, creamy, and honestly… dangerously delicious.
And if you’ve ever wondered how it’s different from coconut oil, you’re not alone—I asked the same question the first time I dipped my spoon into a jar.

Here’s the simple breakdown: coconut butter uses the whole coconut meat, blended until it becomes this dreamy, spreadable cream. Coconut oil, on the other hand, is just the extracted oil.
Think of it the same way you’d compare almond butter to almond oil. One is rich and spoonable… the other is straight-up oil. Same family, totally different vibes.

And the best part?
You can make coconut butter at home. No magic, no fuss—just a food processor and a little patience.


How to Make Homemade Coconut Butter

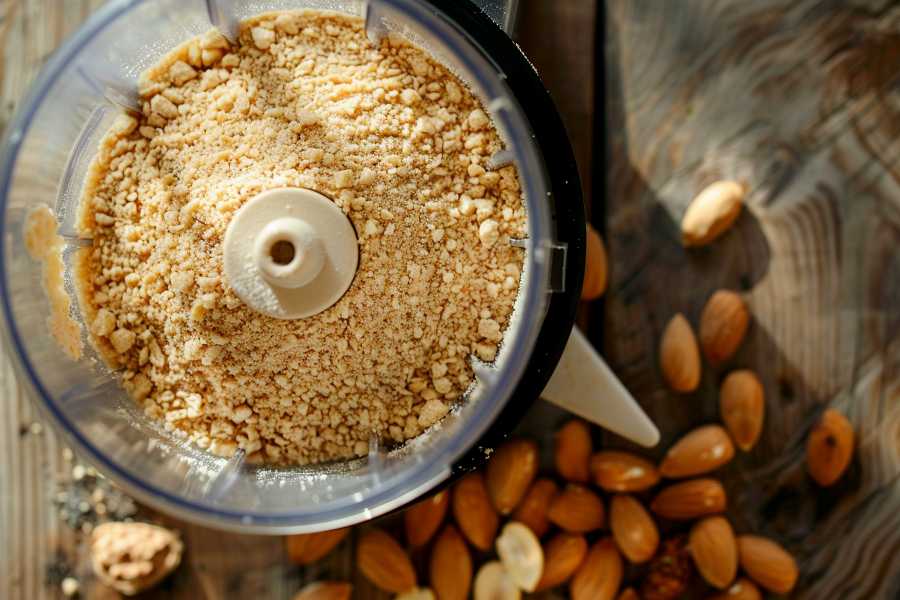
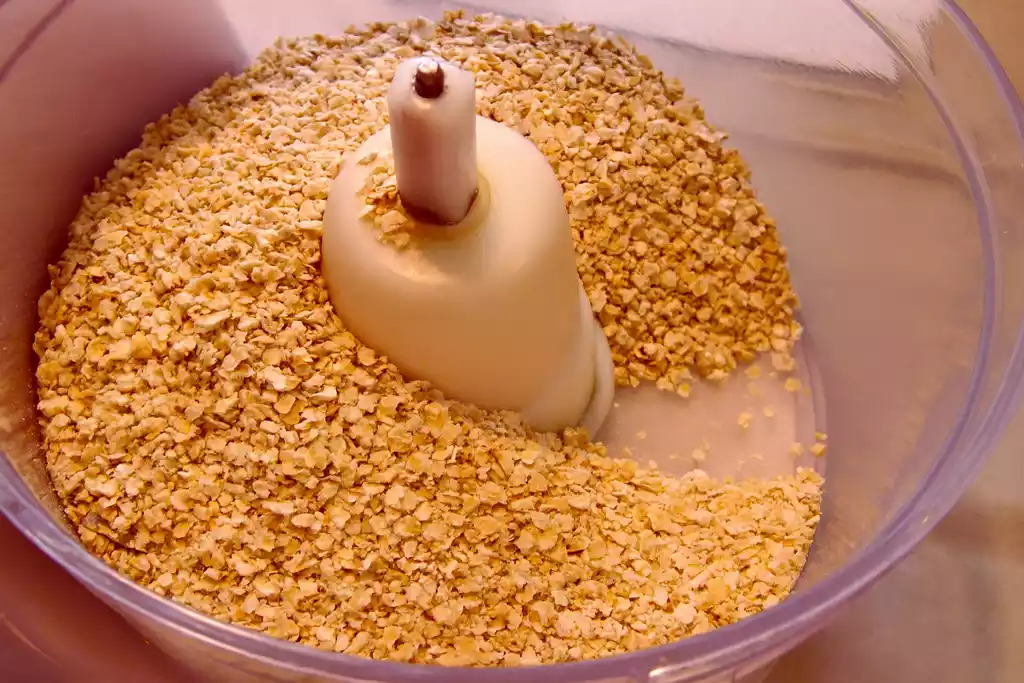
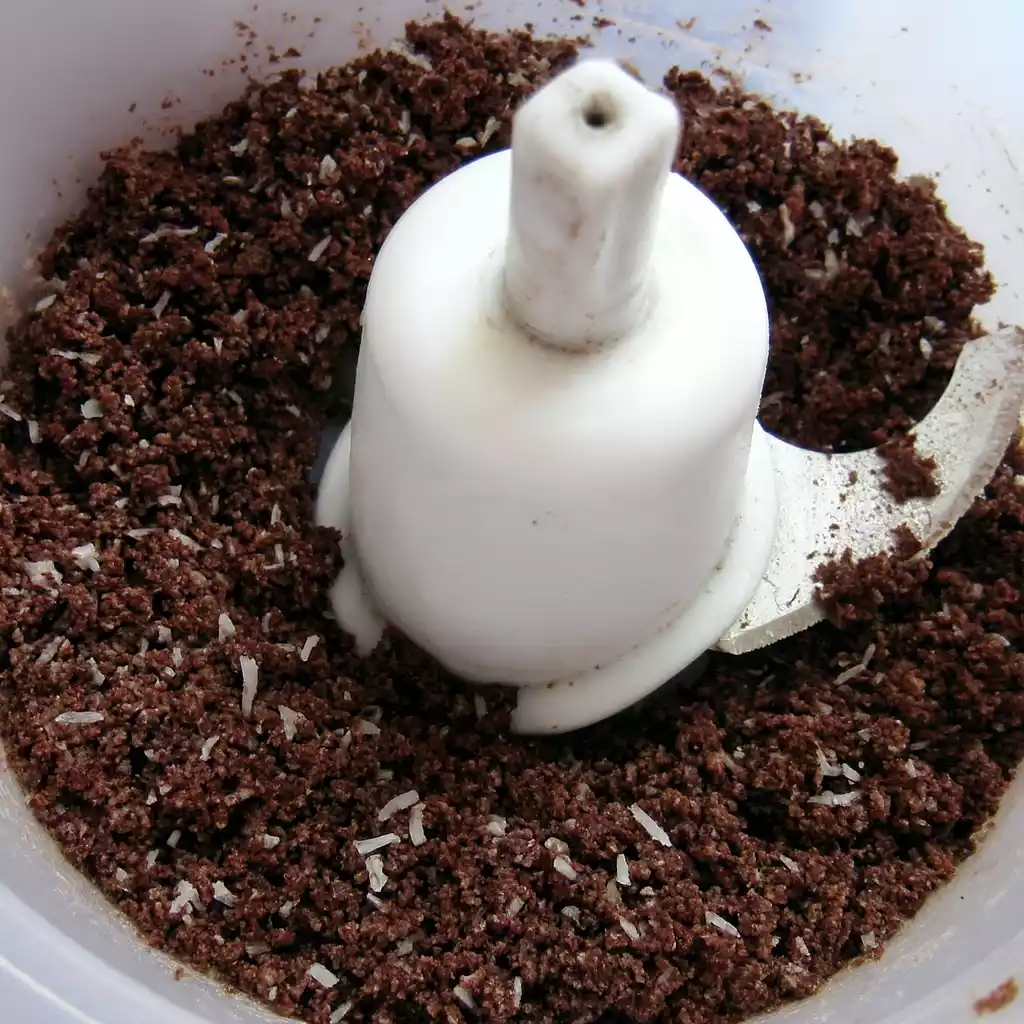
Start with 2 cups of dried, unsweetened coconut flakes. Yes, just that.

Pop them into your food processor and let it run… and run… and run.
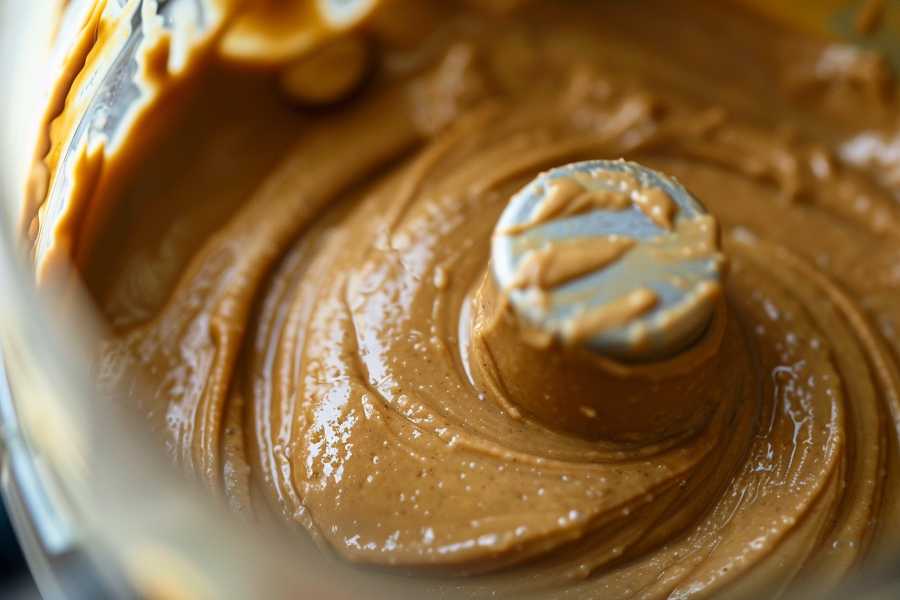
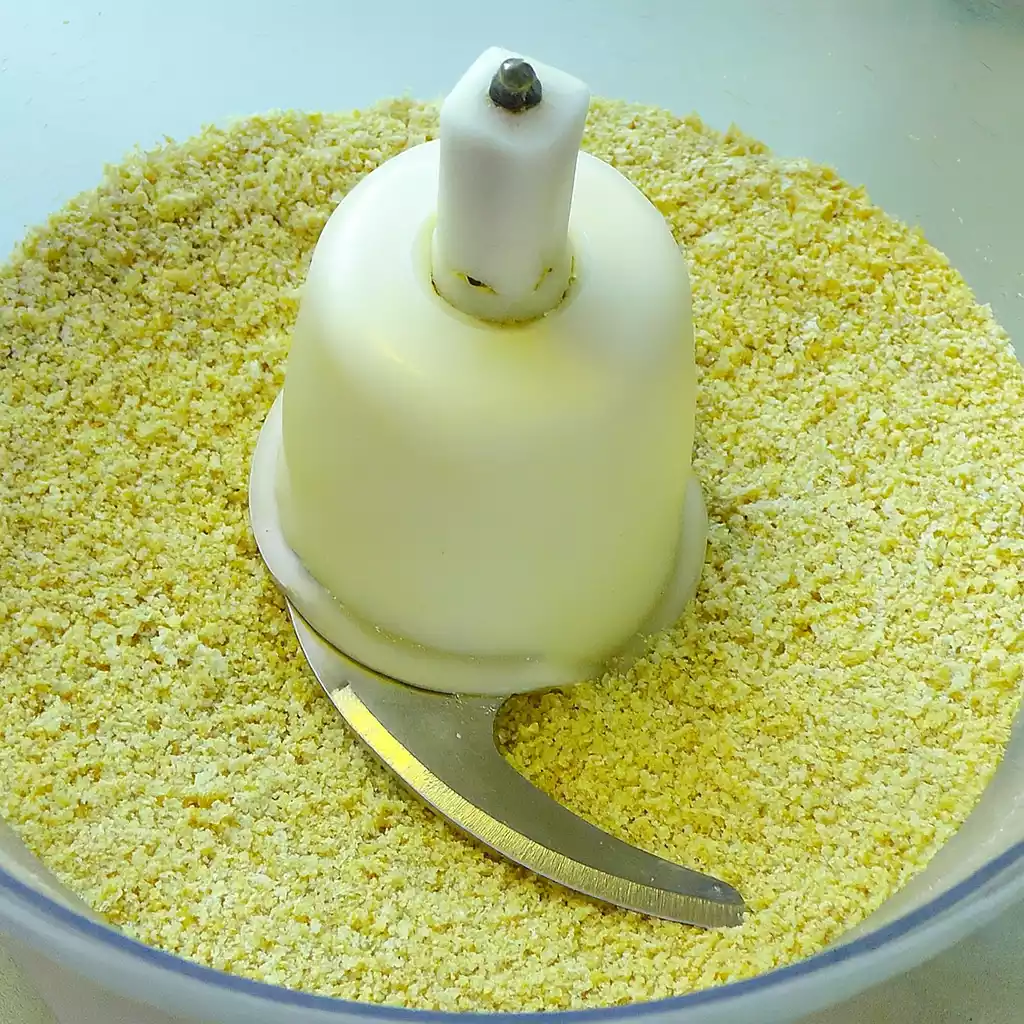
For about 10 minutes, nothing exciting seems to happen—and then suddenly, the coconut transforms. It gets glossy, silky, almost like it’s melting into itself.

If you’re like me and love extra creaminess, let it process up to 20 minutes. You’ll get a texture that feels almost indulgent.

And when it’s done?
It’s magic in a jar.


What to Do With Coconut Butter (aka: The Fun Part)

Oh, you’re going to love this:

  • enjoy it by the spoonful (chef’s kiss)
  • stir it into baked treats
  • spread it on warm toast
  • whisk in cocoa powder for a chocolatey dream spread
  • use it as frosting on… honestly, anything
  • swirl it with almond butter for a decadent snack
  • melt it over a baked sweet potato or pancakes
  • OR… make the lemon truffle fudge below 👇

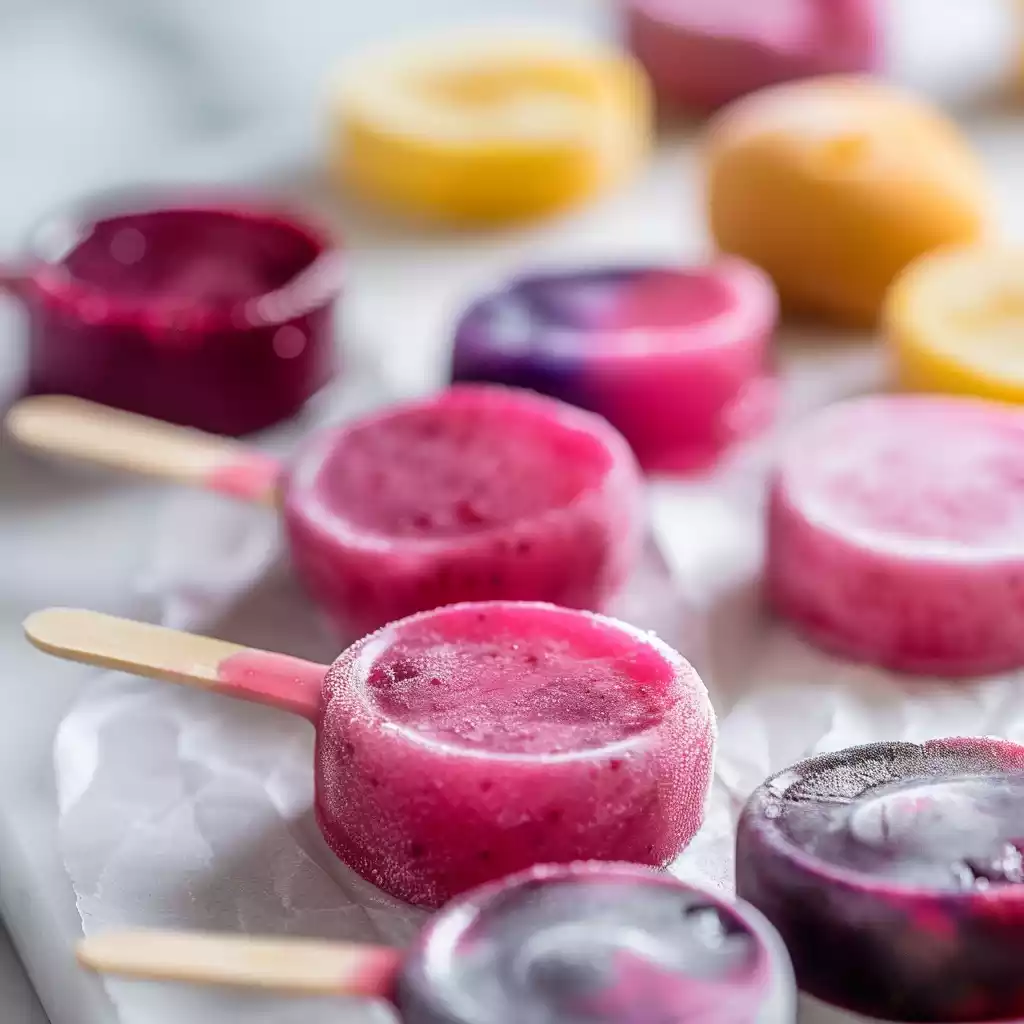
Lemon Coconut Truffle Fudge (Fresh, Creamy, Addictive)

This little recipe tastes like sunshine: creamy, lightly tart, sweet without being too much. It’s the kind of treat you stash in the freezer and “accidentally” come back to three times a day.

You’ll Need:

  • zest of 1 lemon
  • juice of 1 lemon
  • 1/2 cup coconut butter
  • 1/2 cup melted coconut oil
  • 2 tbsp maple syrup or honey

Instructions

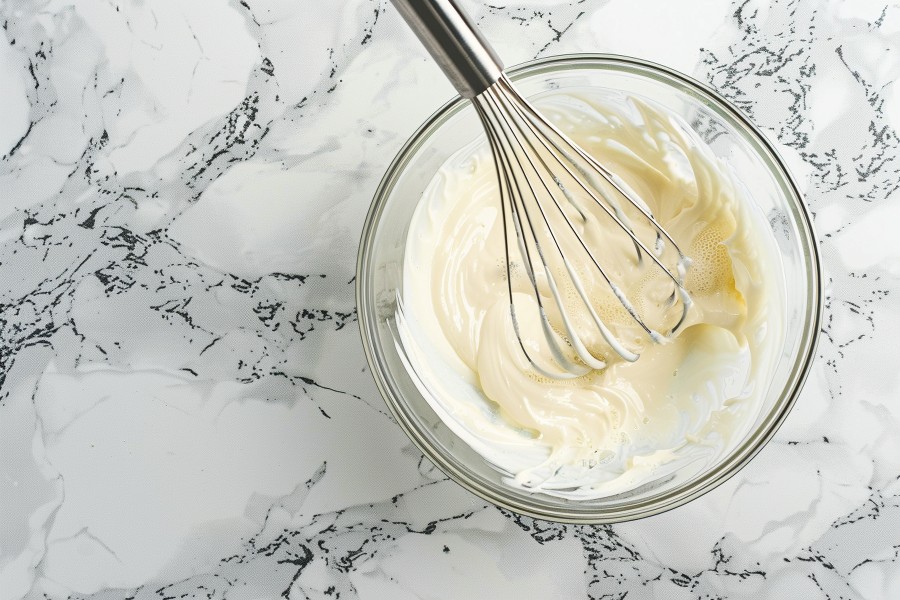
Mix everything together until the texture looks smooth and dreamy.
Pour into candy molds or simply spread the mixture into a small dish.
Freeze for about 10 minutes, just until firm.

Slice, pop out, and… enjoy that first bite. You’ll see what I mean.

Easter Pops

Oh my goodness… I loved making these little treats, and honestly, they turned out adorable.
Sure, they wouldn’t survive long in an Easter basket — trust me, the coconut milk would melt faster than little hands can grab them — but they still make the sweetest Easter treat. And bonus… they’re actually healthy! Good fats for those growing bodies we love so much.

Easter Pops

  • 2 (16 oz.) cans organic coconut milk (light or full-fat — either works!)
  • 4 tbsp. agave, honey, or maple syrup
  • Freeze-dried raspberries, tangerines, blueberries (I grabbed mine at Trader Joe’s!)

For the green coconut “grass,” you can peek at my other post!

Start by whisking or blending the coconut milk with your sweetener. Divide the mixture into three bowls and set them aside for a minute.

Now for the fun part… the colors!
Pink from dried raspberries, orange from dried tangerines, purple from dried blueberries. If you can’t find freeze-dried fruit, fresh fruit works too — I’ve done it both ways.

Freeze-dried fruit usually comes in a little bag like this…

Pop the fruit (one color at a time!) into a coffee grinder or small food processor. You’ll get the prettiest, most vibrant powder — this becomes your natural dye.

The more you add, the deeper the color. Mix each powder into its own coconut-milk bowl.

Pour the first color into cupcake liners…

Cover the tray with plastic wrap and poke holes for your lollipop or popsicle sticks. The plastic wrap holds them upright so they freeze straight — mom hack!

Freeze for about 30 minutes. They don’t need to be rock solid, just firm enough to hold the next layer.
Pour the second color… freeze again.
Pour the third… and let that final freeze go for 3–4 hours or even overnight.

Peel off the wrappers before serving.

And look at them… seriously… how cute are these??

They’d even be perfect for a little girlie princess party — all pastel, all magical, all smiles!

Looking for more Easter treats?

  • Try my Homemade Fruit Lollies
  • Or my Non-Dairy Chocolate Sunbutter Cups
  • Or even my chewy, dreamy Non-Dairy Caramels

Healthy Fruit Lollies

Healthy fruit lollies… yes, really.
And honestly? They’re amazing for kids.

If you tried my rainbow fruit leather, this is the same fun idea—just shaped into cute little suckers instead. Total win for little hands.

I took way too many photos while making these (I was basically a proud parent), so just hang with me while I walk you through it.


Let’s Start with the First Colors

I went with red, orange, and yellow for the first batch.

RED:

  • 1 banana
  • 3 oz raspberries
  • 1 tbsp agave
    Blend everything and set aside.

ORANGE:

  • ½ of the red mixture
  • ½ of the yellow mixture
    Mix them together for the perfect orange shade.

YELLOW:
Option 1:

  • 1 banana
  • 8 thawed frozen peach slices
  • 1 tbsp agave

Option 2:

  • 1 banana
  • 1 mango
  • 1 tbsp agave

Blend and set aside.


Shaping the Lollies

Work one color at a time.
Scoop your fruit purée into a sandwich bag, snip off a teeny corner, and use it like a piping bag. Pipe little circles onto parchment paper (or any non-stick sheet on a baking tray).

Place your sucker sticks in the center, then cover the top with a bit more purée.

Repeat with every color.

And yes—orange may look pink at first, but it dries into more of an orangey tone.


Drying Time

Set your oven to the lowest temp—around 170°F—and keep the door slightly open so the temperature stays lower.

Let the lollies dehydrate for 1 to 3 hours, depending on thickness. Some will dry faster than others, so check occasionally.

When they’re ready, they’ll feel like fruit leather—soft and bendy. Let them cool and rest a bit and they’ll firm up into that true sucker texture.


A Cute Display Idea

Remember the chalkboard art center I shared a while back?

I used it to hold the suckers and it was absolutely adorable.


Round Two: More Colors!

GREEN:

  • 1 banana
  • A handful of spinach
  • 1 tbsp agave

BLUE:

  • 1 banana
  • 3 oz blueberries
  • 1 tbsp agave

PURPLE:

  • 1 banana
  • 3 oz blackberries
  • 1 tbsp agave

Blend each color separately, pipe your circles, and dehydrate them like before.
The colors will shift a bit as they dry, but the charm stays.


The Final Result

They taste just like fruity, chewy fruit leather.
And even if the colors aren’t as bold as candy-store suckers, the novelty is all kids need. I passed them out to neighbors, my niece and nephew, and my own kiddos—they knew these weren’t real suckers, but the idea was enough to get them excited. They all asked for seconds.

Honestly? These would be adorable in Easter baskets too.

Would you try making your own fruit lollies?

Homemade Almond Butter

Homemade almond butter…

…and a tiny little life lesson in patience.

Yep, today you’re getting a two-for-one.

Almond butter tastes dreamy and it’s honestly simple to make, but it does ask for one thing: patience… and a good chunk of it.

Ready? Aprons on. Let’s go.

Start with a handful of raw almonds — okay, three cups if you’re like me — and pour them straight into your food processor.

Here comes the “hard” part…

Turn. It. On.

That’s it. No secrets. No magic. Just you, your almonds, and a whirring machine teaching you about character development.

And now the patience lesson begins.

Because at:

1 minute in…
you’re excited.

5 minutes in…
you’re still hopeful.

10 minutes in…
you start questioning every life choice that brought you here.

You’ll catch yourself thinking:

“Maybe I messed this up.”
“Should I add oil? It looks dry…”
“Is my food processor… broken?!”

Just keep blending, just keep blending — yes, read that in Dory’s voice, because that’s exactly how I hear it too.

15 minutes in…
your food processor gets warm, maybe even a little dramatic with some steam. Totally normal. Give it a tiny breather if needed. We’re not here to burn down kitchens.

Then suddenly you think—
YAY! We have almond butter!

Oh wait… no we don’t.
Keep blending.

20 minutes in…
the oils finally start releasing and you can almost taste victory.
Stay patient, friend — you’re so close.

Then you’ll see it:
The famous almond ball.

Are we done?
Nope.
Remember what I said? Patience.

Keep blending.

And finally

We have almond butter.

Now add a pinch of sea salt, a drizzle of raw honey, maybe a splash of vanilla if you’re feeling fancy — or leave it plain and proud.

Spoon it into the cutest little jar you own, slap on a label that screams “ALMOND BUTTER,” and admire your 25-minute masterpiece.

Then open it right back up and take a spoonful straight to your mouth.

So. Good.

Now that your almond butter is ready, make this quick little treat:

Grab a sprouted grain tortilla (I adore Ezekiel’s), spread a generous layer of almond butter, and top it with sliced bananas, fresh raspberries, dried blueberries, and a sprinkle of cacao nibs — or chocolate chips if that’s where your heart is today.

You might call this dessert…

I called it dinner.

Chocolate Banana Sunbutter Bars

Bananas, chocolate, sunflower seed butter… do I even need to finish that sentence?
It’s one of those combinations that just makes your heart smile before you even take a bite.

Most people pair bananas with peanut butter, but in our house it’s all about Sunbutter — sunflower seed butter — because both of my kids have peanut allergies. Life teaches you to get creative… and honestly, Sunbutter has become a favorite all on its own.

And because we love to make things interesting around here, we skip the dairy too. So yes, non-dairy chocolate chips step in and save the day — and trust me, you won’t miss a thing.

Put all of that together and you get something pretty magical…

Chocolate Banana Sunbutter Bars

Ingredients

  • 3 cups dried banana chips, ground into a flour
  • 1/2 cup oats, ground into a flour
  • 1/2 tbsp vanilla
  • 1/2 tsp sea salt
  • 1/2 cup Sunbutter or almond butter
  • 1/4 cup maple syrup
  • 1/3 cup sunflower seeds, ground into a flour
  • 1 cup non-dairy chocolate chips, melted

Instructions
Start by placing your ground banana chips, oats, and sunflower seeds into the food processor and give everything a good blend.
Add sea salt, vanilla, Sunbutter, and maple syrup, then process until the mixture turns into a soft doughy ball.

Press that lovely mixture into a pie dish or an 8×8 cake pan. Set it aside and melt your chocolate in a double boiler — slow and steady, just until silky.

Spread the warm melted chocolate over your banana-Sunbutter base, then pop the whole thing into the freezer for 10 minutes so the top layer can firm up.

If you’re like me and love to see it to understand it, here’s how it goes down in the kitchen:

  • Grind the banana chips until they turn into a soft flour
  • Grind the oats
  • Grind the sunflower seeds (just imagine the picture!)
  • Blend everything together into a smooth dough
  • Press into your pan
  • Melt the chocolate
  • Spread it generously
  • Freeze for 10 blissful minutes

And now for the best part…
These bars don’t need a storage container — they’ll find a home right in your belly.

Banana Split Pie

Yep, you read that right—I somehow turned a classic indulgence into a wholesome, feel-good treat made almost entirely from real ingredients. Sure, this isn’t going to compete with a green smoothie or a veggie-packed salad, but honestly? There’s always space in life for a dessert that makes you smile. And when that dessert happens to sneak in multiple servings of fruit… I call that a win.


The Banana Split Pie Recipe

The Crust

  • 2 cups organic oats, ground into flour
  • ½ cup melted coconut oil
  • 2 tbsp cacao or cocoa powder
  • 4 tbsp sucanat or cane sugar
  • ¼ tsp sea salt (don’t skip this—this tiny bit of salt makes the crust unbelievably good)
  • 3 tbsp unsweetened dried coconut flakes
  • 8.75 or 10-inch springform pan, or an 8×8 or 10×10 dish greased with coconut oil

Add the ground oats, cacao, sea salt, coconut flakes, and sugar to your food processor. Start blending, and while it runs, pour in the melted coconut oil until a dough forms. Press this mixture firmly into your greased pan. Pop the crust into the freezer for 10 minutes while you move to the next layer.


Coconut Cream Layer

  • 1 can organic coconut milk (chilled overnight or at least 12 hours)
  • 1 tsp vanilla or the seeds from a vanilla bean
  • ¼ cup agave, maple syrup, or honey
  • ¼ cup coconut oil, melted and cooled (warm oil will prevent the cream from setting)

Open the refrigerated coconut milk and scoop out the solid cream on top. Keep the liquid at the bottom for smoothies later. Add your vanilla and sweetener, then whisk or blend until smooth. Pour in the cooled coconut oil and blend again. Spread this dreamy coconut layer over your crust. Freeze for 10 minutes so it can firm up enough to hold the toppings.


Fruit & Topping Layers

  • 2 bananas, sliced
  • 1 cup fresh pineapple chunks
  • 1 cup sliced strawberries
  • 1 cup dairy-free chocolate chips, melted
  • 2 tbsp dried coconut flakes

Layer the bananas over the coconut cream. Add the pineapple, then the strawberries. Drizzle your melted chocolate over the whole pie and sprinkle with coconut flakes before it sets. Freeze for another 10 minutes to harden the chocolate.

Store the pie in the refrigerator, covered, for up to three days—if it lasts that long.


Step-by-Step with Photos

For the crust:

Process your oats into flour.

Add the remaining crust ingredients.

Press into your pan and freeze.

For the coconut cream:

  • Open the chilled coconut milk.
  • Scoop out the solid cream and mix with the remaining ingredients.
  • Spread over the crust and freeze again.

Assembly:

Add banana slices.

Add pineapple.

Add strawberries.

Finish with melted chocolate and coconut flakes.

Pumpkin Love

We’re halfway through November, and honestly… it still feels like full-on pumpkin season in my kitchen. Everywhere I turn, there’s a pumpkin waiting to be cooked, blended, or turned into something cozy. Here’s what we’ve been whipping up this month!

First mission? Pumpkin seeds.
I handed the kiddos a couple of big spoons and told them it was “their special job.” The look on their faces when they touched those slimy pumpkin guts… priceless. They scraped, giggled, complained a little, and finally got every last seed out.

We soaked them, patted them dry, tossed them with a splash of oil and sea salt, and baked them until golden. They came out so good—crunchy, salty, the kind of snack that disappears faster than you expect.

Next up, the pumpkin itself.
I sliced it into four big wedges, set them into a baking dish with a little water and cinnamon, and let the oven do the magic. About 45 minutes at 350°F was all it took for the flesh to soften. I scooped it out, blended it into a silky purée, and yes… I saved a little bowl for my 10-month-old niece. She loved it. (Pumpkin babies are the cutest babies.)

The rest of that gorgeous purée? It went straight into two of my favorite fall treats.


Pumpkin Ice Cream

This one surprised me—in the best way. I blended pumpkin purée with cinnamon, vanilla, and a scoop of non-dairy ice cream, then poured it into my ice-cream maker. Twenty minutes later… pumpkin heaven.

And because we’re us, we crumbled organic graham crackers on top.
If you want a lighter version, try frozen bananas + pumpkin + cinnamon + maple syrup + vanilla. Blend until creamy. Trust me.


Pumpkin Smoothie

We also made a pumpkin smoothie that tasted like fall in a glass.
Here’s what I tossed into the blender:

  • 1 cup almond milk
  • 1 banana
  • 1/2 cup pumpkin purée
  • 1 tbsp almond butter or SunButter
  • 1 tbsp maple syrup or agave
  • A dash of cinnamon, nutmeg, and vanilla
  • Ice to make it frosty

Blend, sip, enjoy… and maybe hold the glass with two hands because it’s that comforting.

Non Dairy Caramel Apples

There’s something about fall that makes caramel apples feel absolutely essential, right? Gooey, sticky, a little nostalgic… they just belong next to cozy sweaters and crisp leaves.
But the store-bought ones? Between the dairy-loaded caramel, the questionable ingredients, and the nut toppings (a big nope in my house), they’re definitely off the table.

So classic mom move I just made my own. I cracked the cider-mill-donut dilemma, and now we’re tackling caramel apples. And honestly? These turned out shockingly close to the real deal… maybe even better because you know exactly what’s in them.

Let’s Make That Dairy-Free Caramel Magic

Start with soaking 1 cup of dates in water for about an hour. Don’t forget to remove the pits learn from my chaos.
Soak ¼ cup of raisins too. Once both are plump and soft, drain the water and toss everything into your blender or food processor.

Add:

  • 1 tablespoon of almond or coconut milk
  • 2 tablespoons of Sunbutter or almond butter
  • A splash of vanilla
  • A teeny pinch of sea salt

Now blend… and keep blending. This isn’t an instant-smooth situation, it takes time. You might need an extra splash of milk, and definitely pause to scrape down the sides. You’re aiming for a thick, spreadable caramel, not a smoothie.

While your caramel is working its way into creaminess, go ahead and slide popsicle sticks into your apples. They’ll look adorable already.

When the caramel hits that glossy, spreadable stage, oh yes, coat those apples generously.

Make Them Your Own

You can enjoy them just like that, or roll them in extra goodies. Think:

  • Ground flax
  • Coconut flakes
  • Dairy-free chocolate chips
  • Sunflower seeds
  • Or whatever fall-inspired topping your heart dreams up

I went for salty sunflower seeds and dairy-free mini chocolate chips… perfection.

Here’s the funny part: my kids won’t touch raisins or dates on their own. Not a chance. But did they devour these caramel apples? Absolutely. Zero clue what the caramel was made of, and they loved every bite.

DEEE-LICIOUS.

P.S. This recipe was husband-approved too. I have photographic evidence… but I’m saving it for future bargaining power. 😉

Now tell me, what would you roll your caramel apples in?

Better Than PB and J Sandwich

When I was a kid, peanut butter and jelly sandwiches were pretty much my love language.
Soft, fluffy Wonder bread…
That super-smooth Jif peanut butter…
And a big swipe of sugary Smuckers jam…

I’m pretty sure there’s even a photo somewhere of me on my swingset, wearing a tiny red bathing suit, grinning with a PB&J in my hand.
Oh, how things change.

Now that I’m a grown-up, I know exactly what comes with that fluffy white bread (spoiler: not much nutrition), and that sweet jam? A whole lot of sugar. Peanut butter left my world the moment I learned about my kids’ allergies… and as for the red bathing suit—well, motherhood has a way of retiring certain wardrobe choices. Let’s just say that chapter closed a while ago. 😉

So what’s a girl supposed to do?

Compromise.


My Better-Than-PB&J Sandwich

Here’s what you need:

  • Sprouted whole grain tortilla (Ezekiel is my go-to)
  • Almond butter
  • Fresh sliced strawberries
  • Fresh sliced bananas
  • Dried blueberries
  • Cacao nibs

Spread the almond butter all over your tortilla. Layer on the strawberries, bananas, and dried blueberries. Sprinkle a few cacao nibs—or if you’re in the mood for something extra fun, go ahead and add a handful of mini chocolate chips. Roll it up like a burrito or fold it like a taco and enjoy every bite.

The sandwich compromise? Delicious.
The swimsuit compromise? Let’s just say that one didn’t go quite as well… just saying.

Rainbow Fruit Cups

Hey friends!! I couldn’t resist sharing this bright little idea to pair with my “Taste the Rainbow” post below. It’s the kind of snack that just feels like Spring—fresh, colorful, and so fun for the kids!

I made mine in individual cups for my two little ones, but honestly, this would look gorgeous in a big glass trifle bowl if you’re serving family or friends. Just grab a clear container—mine was a simple plastic cup I recycled!—or go fancy with a pretty sundae dish.

Then comes the fun part: layer your fruit in rainbow order! Here’s what I used:

RED: chopped strawberries
ORANGE: sweet mandarins
YELLOW: juicy mango
GREEN: fresh kiwi
BLUE: plump blueberries

If you want to add a cute little “cloud,” slice a banana on top and let it sit right over your rainbow. One trick: make sure to dice the fruit small so each layer stays neat and doesn’t get too thick.

Use whatever fruit you love—there are tons of ideas in the post below. Have fun with it!!

ENJOY!!